
What to Expect During a Whole-Home Repipe: The 8 Stages
Quick Answer: A whole-home repipe replaces all the supply piping in stages: assessment and planning, protecting the home, shutting off water and opening access, running new PEX or copper lines to every fixture, connecting fixtures and the water heater, pressure-testing, inspection where required, then patching and restoring water. Small homes often finish in a day; larger ones take a few days.
A whole-home repipe replaces the water supply piping that feeds every faucet, shower, toilet, and appliance in the house. It is the fix homeowners reach for when the old lines have earned their retirement: galvanized steel that has rusted from the inside out, polybutylene that keeps splitting at the fittings, or copper riddled with pinhole leaks. Once the supply lines fail in one spot, they tend to fail in another, so patching a single section rarely buys much peace. A repipe swaps the whole network at once.
If you have never lived through one, the idea of a crew opening your walls can sound alarming. The reality is more orderly than most people expect. A good repipe follows a predictable sequence, and knowing the stages ahead of time makes the difference between a stressful week and a minor inconvenience. Below is a walk-through of each phase, what you will notice while it happens, and how to get your home ready.
Why a Repipe Instead of Another Patch
Supply pipe fails as a system, not as a single spot. When galvanized steel corrodes, the rust builds up along the entire run, narrowing every pipe and staining the water at every tap. Polybutylene, common in homes built between the late 1970s and mid-1990s, grows brittle and lets go at the crimp fittings no matter which section you repair first. Copper with pinhole corrosion tends to spring the next leak a few feet from the last one.
Because the weakness is spread through the whole network, replacing one length only shifts the next failure down the line. A repipe addresses the root instead of the symptom. The payoff is the reason people take it on: an end to recurring leaks, clear water instead of rusty water, and steady pressure at every fixture at the same time, even when the shower and the dishwasher run together.
The Stages of a Whole-Home Repipe
The process runs like a relay where each stage hands off cleanly to the next, and a typical job unfolds in this order.
Assessment, Estimate, and Route Planning: A plumber walks the home first, notes every fixture and appliance that needs water, and locates the existing pipe runs. From there, the crew maps out where the new lines will travel: through attics, under floors, and inside wall cavities. Good route planning is what keeps wall damage to a minimum, because the shortest, most accessible path means fewer access holes later. You will get an estimate and a rough schedule at this stage, along with a plan for whether the job runs through the attic, the crawlspace, or both.
Protecting the Home: Before any tool comes out, the crew lays drop cloths and runs plastic sheeting along the work paths. Furniture near the walls gets moved or covered, and floors under access points are protected. Repiping kicks up drywall dust, so containment matters. A tidy setup at the start is a fair signal of how the rest of the job will go.
Shutting Off Water and Opening Access: The main water supply is shut off, and the crew cuts small, deliberate openings in the drywall wherever a new line has to be threaded or a connection made. These holes are usually a few inches across and placed near fixtures, in closets, and at wall stud bays.
In older homes, opening a wall can expose more than pipe. Homes built before 1980 may hold asbestos in wall materials, along with electrical or gas lines running through the same cavities, so licensed crews test and handle those conditions rather than cutting blind.
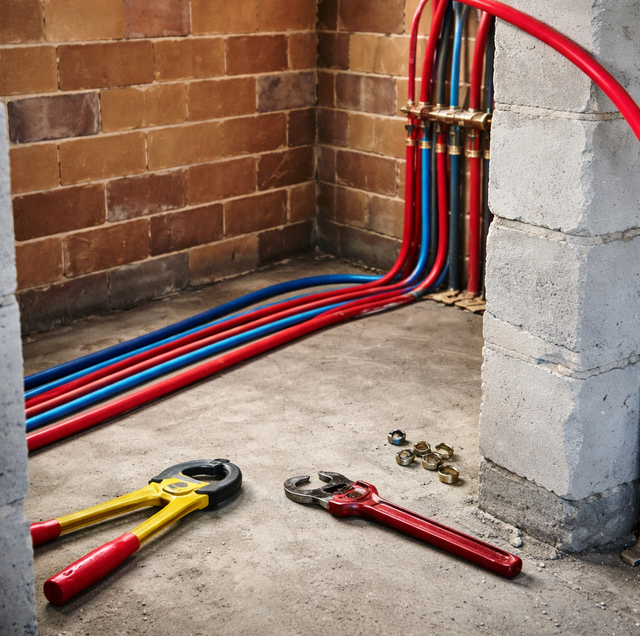
Running the New Lines: With access open, the crew pulls new supply lines to every fixture. Most modern repipes use PEX, a flexible plastic tubing that snakes through framing with fewer joints, though copper is still chosen in some homes. The lines travel from the water source out to each destination, and the flexibility of PEX means fewer walls have to be opened to make the runs. This is often the longest stage, and the part where you will hear the most movement in the attic or under the floor.
Connecting Fixtures and the Water Heater: Each new line gets tied into its fixture: sinks, tubs, showers, toilets, the washing machine hookup, and the water heater. Connections are made with proper fittings rated for the pipe material, and shutoff valves are typically installed or replaced at each fixture along the way. The water heater is reconnected on both its cold inlet and hot outlet. Sound, code-compliant connections inside walls are exactly why this work belongs to a licensed plumber. An in-wall leak from a bad joint is expensive and hard to find, which is the opposite of what a repipe is meant to deliver.
Pressure-Testing the New System: Before anything gets closed up, the crew pressurizes the new piping, usually with air or water, and watches for pressure loss that would reveal a leak. This test happens while the walls are still open, so any weak joint can be corrected on the spot. A system that holds pressure is proof that the new network is sound.
Inspection and Permit Where Required: Many areas require a repipe to be permitted and inspected, though the rules vary from one jurisdiction to the next. Where an inspection applies, a building official reviews the open work before the walls are patched to confirm the installation meets local requirements. Your plumber handles the permit and schedules the inspection. Verify locally what applies to your address, since a permitted, inspected job protects both the work and its warranty.
Patching, Touch-Up, and Restoring Water: Once the system passes, the access holes get patched. Practices differ here: some repipe crews patch the drywall and leave it ready for texture and paint, while others close the holes to a rough stage and leave finish work to a drywall or paint contractor. Ask which approach your crew follows so there are no surprises. When patching is done, the main is turned back on, the lines are flushed to clear any debris, and each fixture is checked for flow and leaks.
How Long It Takes
Timeline depends more on the size and layout of the home than anything else. A compact single-story house with easy access can be repiped in a single day. A larger home, a multi-story layout, or one with a finished basement and limited attic access can run two or three days. Homes with slab foundations or hard-to-reach runs add time because the routing is more involved. Your estimate should include a realistic day count based on your specific floor plan, not a generic average.
What to Expect While the Work Happens
The water goes off for stretches of the day, sometimes for most of it, so the house is without running water during active work. You will hear drilling, sawing, and movement overhead or underfoot, and drywall dust will settle despite the containment. There will be neatly placed holes in walls until the patching stage. None of this is a sign that something has gone wrong. It is simply how a supply network gets replaced without tearing the house apart. Crews clean up dust and debris as they close out, and the disruption ends when the water comes back on.
How to Prepare Your Home
A little setup on your end speeds the whole job and lowers the stress.
Clear access to the walls: Pull furniture, boxes, and shelving away from the walls the crew flagged during the assessment, especially in closets, laundry areas, and around the water heater. The easier the access, the fewer and smaller the holes.
Plan for the water being off: Fill a few pitchers or jugs the night before, and plan meals that do not need a running tap. If anyone in the household needs water on hand for medical reasons, tell the crew so they can sequence shutoffs around it.
Protect what you care about: Cover or move electronics and valuables near work areas even though the crew lays containment, since dust travels.
Confine pets: Set up a quiet room, away from the work paths, with the door closed. Open doors and running crews are an easy way for a nervous pet to slip out.
Ask about the finish plan: Confirm before day one whether your crew patches drywall or hands that off, so you can line up a painter if you need one.
The Payoff
When the water comes back on, and every fixture runs clear and strong, the point of the project becomes obvious. No more chasing leaks from room to room, no more rust-tinted water in the morning, no more pressure that drops the moment a second tap opens. A whole-home repipe trades a few days of dust and inconvenience for supply piping that behaves for decades. For a home that has been fighting its own plumbing, that is a quiet kind of relief.
Frequently Asked Questions
Most homeowners stay put. The water is off for stretches during active work, so many people run errands or work elsewhere during the noisiest hours and return in the evening. The main limitation is no running water while the crew is mid-run, which is why keeping a few jugs on hand and planning around it matters more than leaving the house entirely.
No. A repipe replaces the pressurized supply lines that carry clean water to fixtures. The drain, waste, and vent piping that carries water away is a separate system with its own material and slope requirements, and it is quoted and scheduled as its own project. If a plumber flags aging drains during the assessment, that is a different job from the supply repipe.
Newer PEX tubing can give off a faint plastic taste for the first days after installation, which is why crews flush the lines thoroughly before finishing. Running the cold taps for several minutes over the first week clears any residual taste. The tubing is manufactured to drinking-water standards, and the taste, when it appears at all, fades as the system is used.
Abandoned supply lines are usually capped and left in place rather than pulled out, since removing them would mean opening far more wall than the repipe itself requires. The old lines are disconnected from the water source so they carry nothing, sit dry inside the cavity, and cause no harm once isolated. Only sections in the direct path of the new work get removed.
The service line is the single buried pipe running from the street or well to the house, while a repipe covers the interior distribution to every fixture. A failing service line shows up as low pressure or wet spots in the yard and is handled with excavation or trenchless methods outside. A repipe is interior work. A home can need one, the other, or both, and the assessment distinguishes them.
When you book the job, ask which patch level you are getting: some crews close holes to a rough tape-and-mud stage, while a full level-4 or level-5 finish leaves the wall ready to prime. Matching the existing wall texture, such as orange-peel or knockdown, is a separate skill, and the joint compound needs to dry fully, often a day or so, before it can be primed and painted. Matching existing wall texture and paint sheen is its own skill, so many people schedule a painter for a day or two after the repipe wraps. Confirm during the estimate exactly where your crew's work stops so the handoff is clear.
Ready to trade recurring leaks for piping that lasts — get a clear repipe plan and timeline for your home. PEX Plumbing & Repiping serves Portland, Beaverton, and Tigard. Call (971) 232-3079.
